How to Make a GIF from a Photo Series
GIFs have become a major part of online culture and general communication. At its core, an animated GIF is simply a type of file that contains a series of images to create a small video or animation. They have become so popular that there are even entire websites devoted to the raging debate between pronouncing GIF as “jif” or “gif.” We are going to try our best to stay neutral on that one. Instead, we thought it might be fun to put together a quick how-to on creating your own animated GIF using a series of photographs! As in this example, you can now add animated GIFs and videos to your Greenvelope card. However, you can also use these same steps to create something you might share on social media, a promotional email, or even via text message.
The steps below show how to create an animated GIF using a series of photos in Adobe Photoshop, but there are other online services that will help you create one for free. You can check out a couple here and here. Keep in mind, the free option will often come with some limitations such as built-in watermarks or image quality.
Step 1: Choose Your Photos
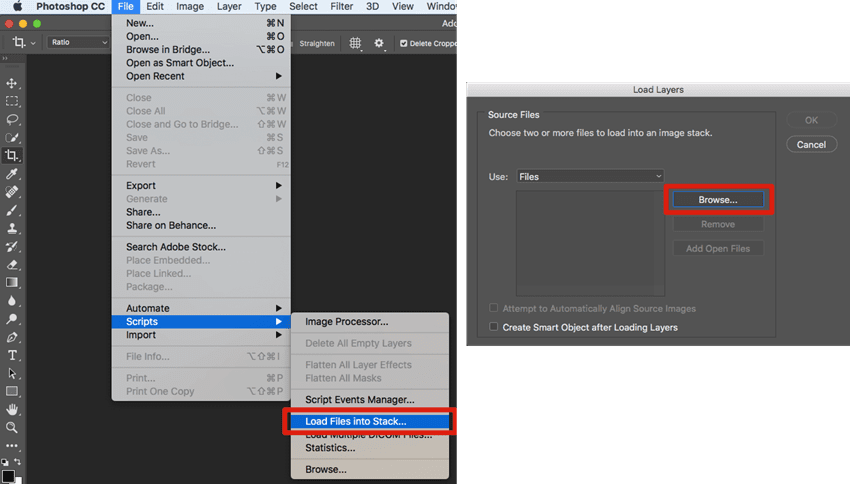
While not required, it is easiest to put all the image files you would like to use in a single folder. This will make it easier to select all the files at once when uploading the images to Photoshop. Once you have decided which photos you would like to use, open Photoshop and select File > Scripts > Load Files into Stack.
From here, click Browse to locate the folder with your images. From inside folder, hold down shift to select all the image files you wish to use. Then click OK. You should now see all the images you have selected on the right under Layers.
Step 2: Open the Timeline Panel
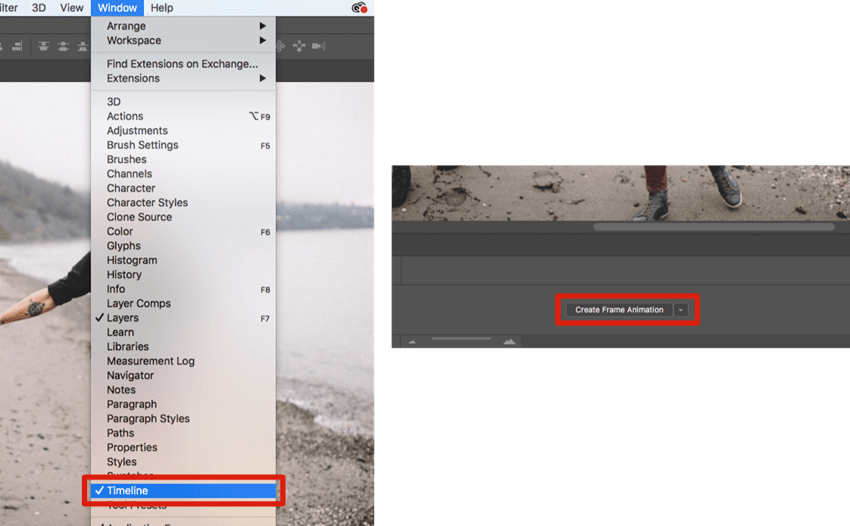
To open the Timeline, go to Window > Timeline. Once open, select Create Video Timeline. You may have to select Create Video Animation under the dropdown menu prior to clicking the button.
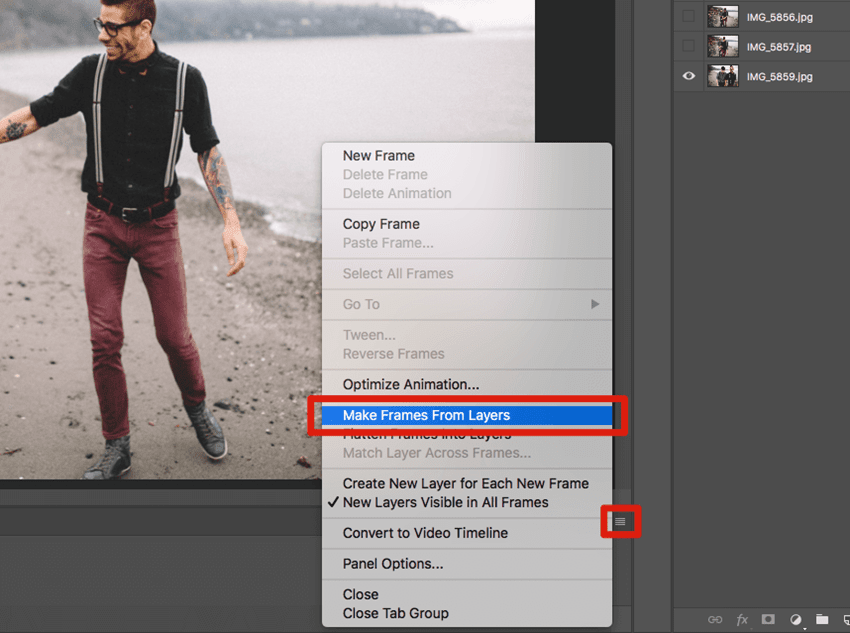
Step 3: Turn Each Layer Into an Animation Frame
You are now ready to convert each of the layers you have created from your selected images into a frame of your soon to be animated GIF. To do this, select the menu icon at the top right of the Timeline Panel and select Make Frames From Layers. You should now see these frames in the Timeline Panel.
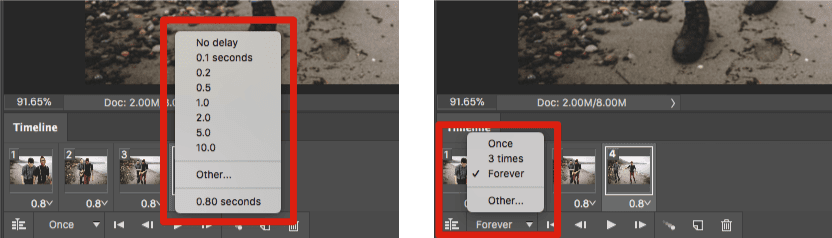
Step 4: Change the Frame Length and Loop Settings
Underneath each frame, you can click the time to change how long the image will appear. While this can vary depending what you want to use your GIF for, we normally suggest between .5 and 1 second.
Underneath the frames, you can select how many times the GIF will loop before it stops playing. While this can be any number of times, the most common setting is Forever. From the Timeline, you can also rearrange the frame order by clicking a frame and dragging it into a new position. If needed, you can also click the menu icon and select Reverse Frames to completely reverse the order in which the images are displayed.
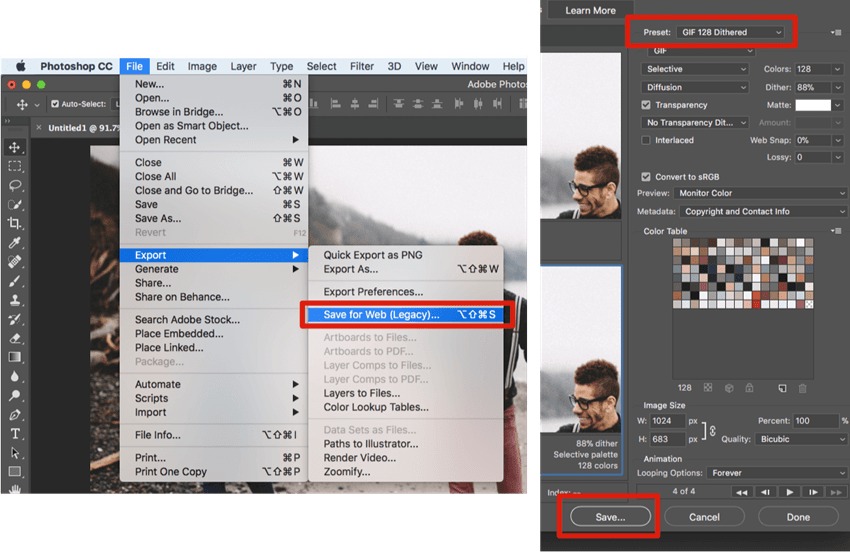
Step 5: Save as a Gif
Now that you have created your GIF, it is time to save it. Select File > Export > Save for Web (Legacy)…
From here, the settings you choose will differ depending on your needs. Under the Preset dropdown, you can select what type of GIF file to create. Again, this can vary based on your needs, but we chose GIF 128 Dithered for our example.
While there are many other decisions you can make here, we have left all other settings alone for our GIF. Click Save at the bottom of this screen and select a name and location for your file. That’s it! You have created your GIF!
As a side note, We also suggest selecting File > Save and saving as a .PSD file in case you need to come back and make changes.
So there you have it! You are now ready to share and send your GIF wherever needed. We are really looking forward to seeing some of the exciting ideas our users come up with to take advantage of being able to create and add their own GIFs to their invitations.
Curious how our GIF turned out? You can see it here on Instagram!